# SpatialTrackerV2: 3D Point Tracking Made Easy
**[CAD&CG, Zhejiang University](https://github.com/zju3dv)**; **[University of Oxford](https://www.robots.ox.ac.uk/~vgg/)**; **[Ant Research](https://www.antresearch.com/)**; **[Pixelwise AI](http://pixelwise.ai/)**; **[NUS](https://nus.edu.sg/)**
[Yuxi Xiao](https://henry123-boy.github.io/), [Jianyuan Wang](https://jytime.github.io/), [Nan Xue](https://xuenan.net/), [Nikita Karaev](https://nikitakaraevv.github.io/), [Iurii Makarov](https://linkedin.com/in/lvoursl), [Bingyi Kang](https://bingykang.github.io/), [Xin Zhu](https://openreview.net/profile?id=~Xing_Zhu2), [Hujun Bao](http://www.cad.zju.edu.cn/home/bao/), [Yujun Shen](https://shenyujun.github.io/), [Xiaowei Zhou](https://www.xzhou.me/)
### [Project Page]() | [BibTeX]() | [Goolge Drive]()


 ## TODO List
1. **Release Offline Version**
- [x] `SpaTrack2` + `Moge` ➔ supports `unposed RGB` as input.
- [x] `SpaTrack2`+ `MegaSAM` ➔ supports `Posed RGBD` as input.
- [x] `SpaTrack2` + `VGGT` ➔ make `VGGT` works in `Dynamic Scenes`.
2. **Release Online Version**
- [ ] Sliding windows version.
3. **More Releases**
- [ ] Some `Ceres Python Bindings` designed for SpatialTracker and Dynamic Reconstruction.
- [ ] More supports for other Depth Model, *i.e.*, `DepthAnything`, `StereoFoundation`, `UniDepth`, `Metric3D`.
## Set up the environment
To set up the environment for running the SpaTrack model, follow these steps:
1. **Clone the Repository:**
```bash
git clone git@github.com:henry123-boy/SpaTrackerV3.git
cd SpaTrackerV3
```
2. **Create a Virtual Environment:**
It's recommended to use a virtual environment to manage dependencies.
```bash
conda create -n SpaTrack3 python=3.11
conda activate SpaTrack3
```
3. **Install Dependencies:**
Install the torch dependencies `pip` (tested with `torch2.4`).
```bash
python -m pip install torch==2.4.1 torchvision==0.19.1 torchaudio==2.4.1 --index-url https://download.pytorch.org/whl/cu124
```
Install the required Python packages using `pip`.
```bash
python -m pip install -r requirements.txt
```
4. **Install SpaTrack3 Visualizer:**
```bash
cd viser
python -m pip install -e .
```
By following these steps, you should have a working environment ready to run the SpaTrack model.
## Download the Checkpoints
```
mkdir -p checkpoints
```
Step1: Download the checkpoint of `Moge` from [here](https://github.com/microsoft/MoGe), and put the `model.pt` into `./checkpoints/`
Step2: Download the checkpoint of `SpaTrack3` from [GoolgeDrive](https://drive.google.com/drive/folders/1GYeC639gA23N_OiytGHXTUCSYrbM0pOo?usp=sharing), and place it into `./checkpoints/`
## Quick Start
We gave two examples to illustrate the usage of `SpaTrack3`. Firstly, please download `ckpts` and `examples` via:
```
sh scripts/download.sh
```
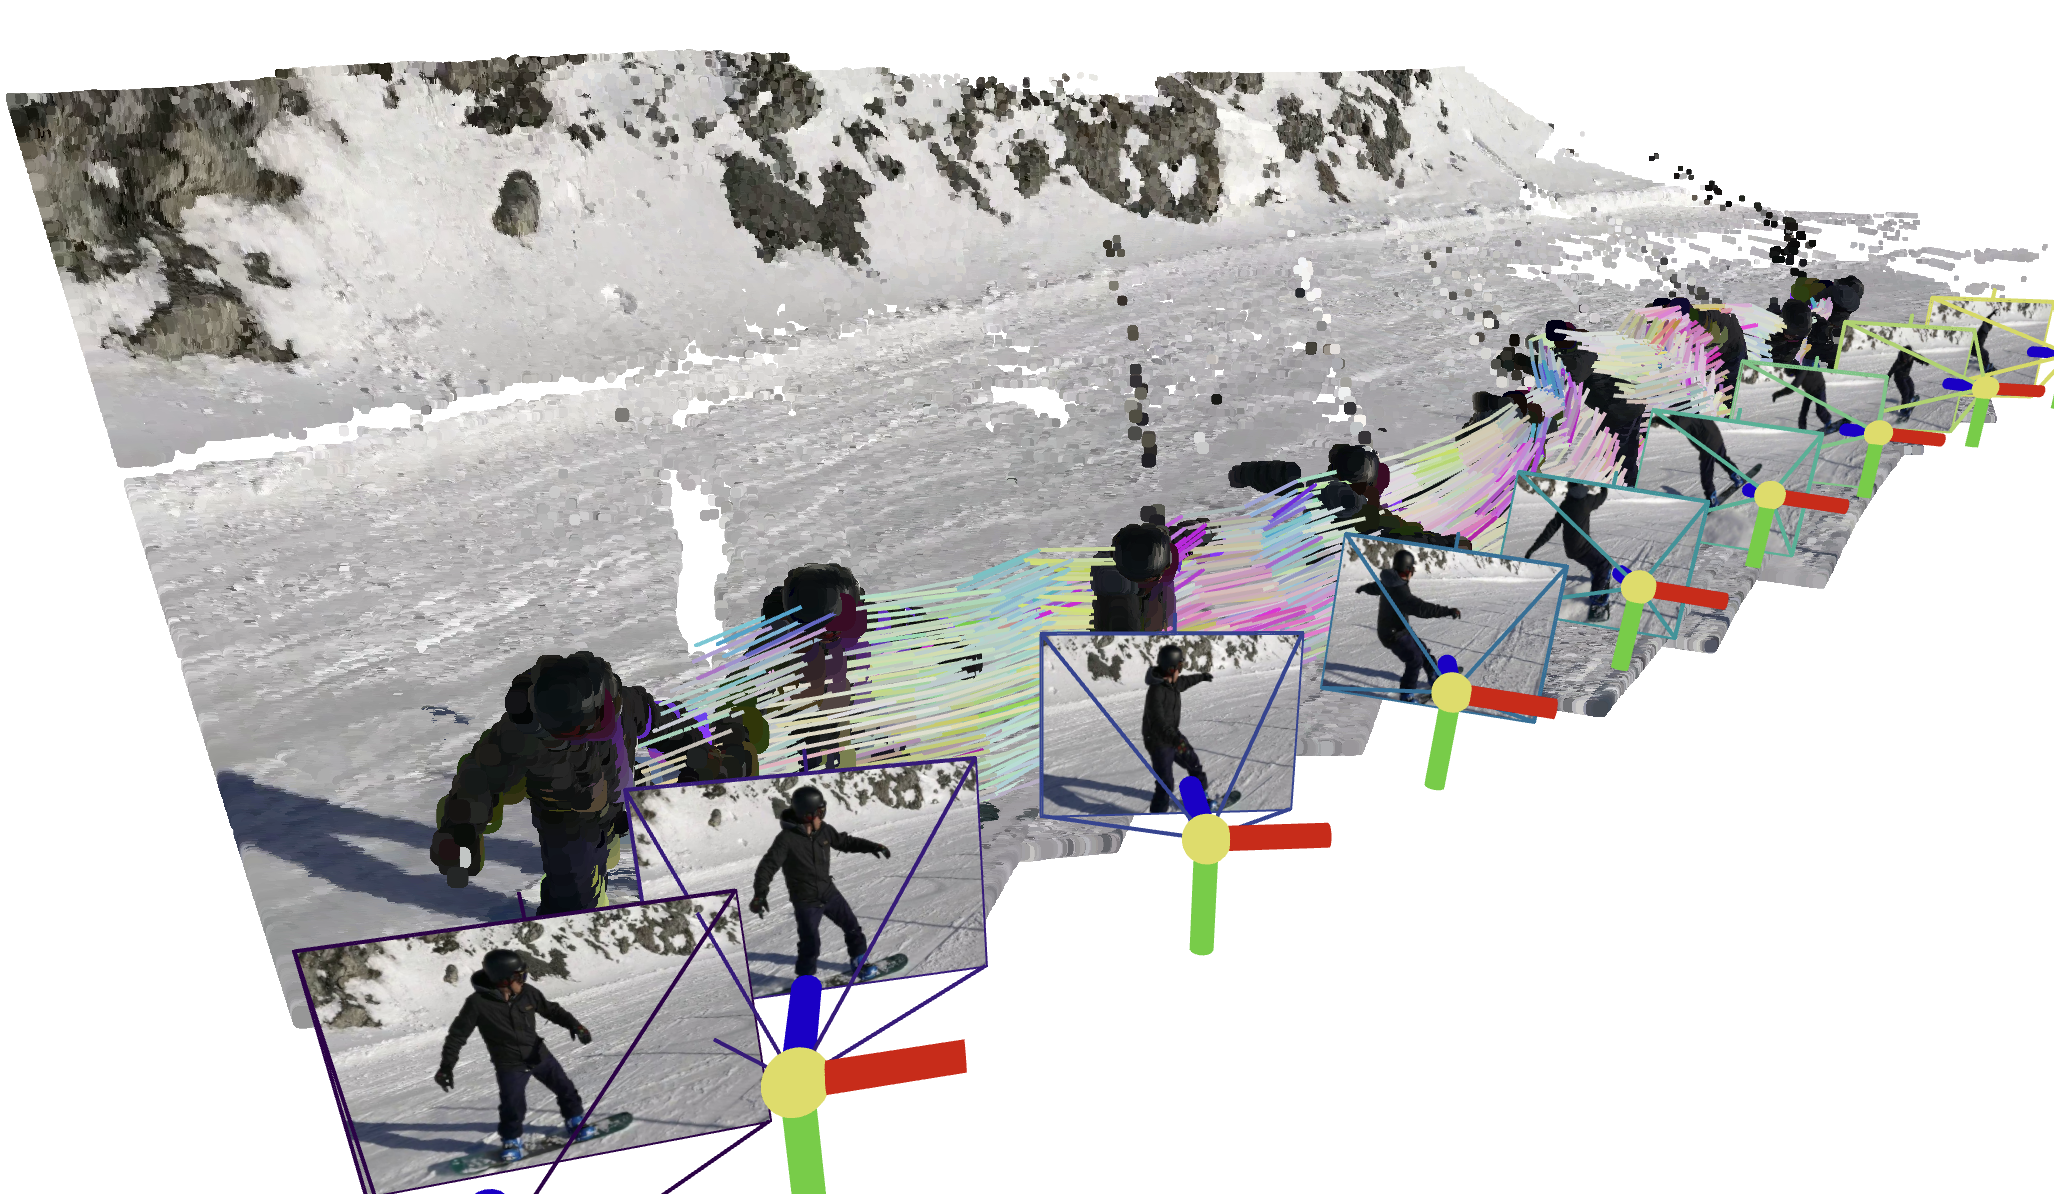
### Type1: Posed RGBD video *(Example0)*
We provide an example who has Posed RGBD input with [MegaSAM](https://github.com/mega-sam/mega-sam).
```
python inference.py --data_type="RGBD" --data_dir="assets/example0" --video_name="snowboard" --fps=1
```
### Type2: unposed RGB video *(Example1)*
```
python inference.py --data_type="RGB" --data_dir="assets/example1" --video_name="xhs" --fps=6
```
### Visualize your results
We provide two types of visualization, i.e. `viser` and `TAPIP3D`. The guidance will be displayed in the terminal after running `inference.py`.
## 🌟 Recommended: Gradio Demo with SAM 🌟
Please follow the instructions in the [app_3rd README](app_3rd/README.md) to configure the dependencies. Then,
```
python -m pip install gradio==5.31.0 pako
```
Our gradio demo enable the user to track the points on the target object easily, just try:
```
python app.py
```
Here is an example with our GUI:

## TODO List
1. **Release Offline Version**
- [x] `SpaTrack2` + `Moge` ➔ supports `unposed RGB` as input.
- [x] `SpaTrack2`+ `MegaSAM` ➔ supports `Posed RGBD` as input.
- [x] `SpaTrack2` + `VGGT` ➔ make `VGGT` works in `Dynamic Scenes`.
2. **Release Online Version**
- [ ] Sliding windows version.
3. **More Releases**
- [ ] Some `Ceres Python Bindings` designed for SpatialTracker and Dynamic Reconstruction.
- [ ] More supports for other Depth Model, *i.e.*, `DepthAnything`, `StereoFoundation`, `UniDepth`, `Metric3D`.
## Set up the environment
To set up the environment for running the SpaTrack model, follow these steps:
1. **Clone the Repository:**
```bash
git clone git@github.com:henry123-boy/SpaTrackerV3.git
cd SpaTrackerV3
```
2. **Create a Virtual Environment:**
It's recommended to use a virtual environment to manage dependencies.
```bash
conda create -n SpaTrack3 python=3.11
conda activate SpaTrack3
```
3. **Install Dependencies:**
Install the torch dependencies `pip` (tested with `torch2.4`).
```bash
python -m pip install torch==2.4.1 torchvision==0.19.1 torchaudio==2.4.1 --index-url https://download.pytorch.org/whl/cu124
```
Install the required Python packages using `pip`.
```bash
python -m pip install -r requirements.txt
```
4. **Install SpaTrack3 Visualizer:**
```bash
cd viser
python -m pip install -e .
```
By following these steps, you should have a working environment ready to run the SpaTrack model.
## Download the Checkpoints
```
mkdir -p checkpoints
```
Step1: Download the checkpoint of `Moge` from [here](https://github.com/microsoft/MoGe), and put the `model.pt` into `./checkpoints/`
Step2: Download the checkpoint of `SpaTrack3` from [GoolgeDrive](https://drive.google.com/drive/folders/1GYeC639gA23N_OiytGHXTUCSYrbM0pOo?usp=sharing), and place it into `./checkpoints/`
## Quick Start
We gave two examples to illustrate the usage of `SpaTrack3`. Firstly, please download `ckpts` and `examples` via:
```
sh scripts/download.sh
```
### Type1: Posed RGBD video *(Example0)*
We provide an example who has Posed RGBD input with [MegaSAM](https://github.com/mega-sam/mega-sam).
```
python inference.py --data_type="RGBD" --data_dir="assets/example0" --video_name="snowboard" --fps=1
```
### Type2: unposed RGB video *(Example1)*
```
python inference.py --data_type="RGB" --data_dir="assets/example1" --video_name="xhs" --fps=6
```
### Visualize your results
We provide two types of visualization, i.e. `viser` and `TAPIP3D`. The guidance will be displayed in the terminal after running `inference.py`.
## 🌟 Recommended: Gradio Demo with SAM 🌟
Please follow the instructions in the [app_3rd README](app_3rd/README.md) to configure the dependencies. Then,
```
python -m pip install gradio==5.31.0 pako
```
Our gradio demo enable the user to track the points on the target object easily, just try:
```
python app.py
```
Here is an example with our GUI:
