4.5 KiB
SpatialTrackerV3: 3D Point Tracking Made Easy
CAD&CG, Zhejiang University; University of Oxford; Ant Research; Pixelwise AI; ByteDance Seed
Yuxi Xiao, Jianyuan Wang, Nan Xue, Nikita Karaev, Iurii Makarov, Bingyi Kang, Xin Zhu, Hujun Bao, Yujun Shen, Xiaowei Zhou
Project Page | BibTeX | Goolge Drive
TODO List
-
Release Offline Version
SpaTrack3+Moge➔ supportsunposed RGBas input.SpaTrack3+MegaSAM➔ supportsPosed RGBDas input.SpaTrack3+VGGT➔ makeVGGTworks inDynamic Scenes.
-
Release Online Version
- Sliding windows version.
-
More Releases
- Some
Ceres Python Bindingsdesigned for SpatialTracker and Dynamic Reconstruction. - More supports for other Depth Model, i.e.,
DepthAnything,StereoFoundation,UniDepth,Metric3D.
- Some
Set up the environment
To set up the environment for running the SpaTrack model, follow these steps:
-
Clone the Repository:
git clone git@github.com:henry123-boy/SpaTrackerV3.git cd SpaTrackerV3 -
Create a Virtual Environment: It's recommended to use a virtual environment to manage dependencies.
conda create -n SpaTrack3 python=3.11 conda activate SpaTrack3 -
Install Dependencies:
Install the torch dependencies
pip(tested withtorch2.4).python -m pip install torch==2.4.1 torchvision==0.19.1 torchaudio==2.4.1 --index-url https://download.pytorch.org/whl/cu124Install the required Python packages using
pip.python -m pip install -r requirements.txt -
Install SpaTrack3 Visualizer:
cd viser
python -m pip install -e .
By following these steps, you should have a working environment ready to run the SpaTrack model.
Download the Checkpoints
mkdir -p checkpoints
Step1: Download the checkpoint of Moge from here, and put the model.pt into ./checkpoints/
Step2: Download the checkpoint of SpaTrack3 from GoolgeDrive, and place it into ./checkpoints/
Quick Start
We gave two examples to illustrate the usage of SpaTrack3. Firstly, please download ckpts and examples via:
sh scripts/download.sh
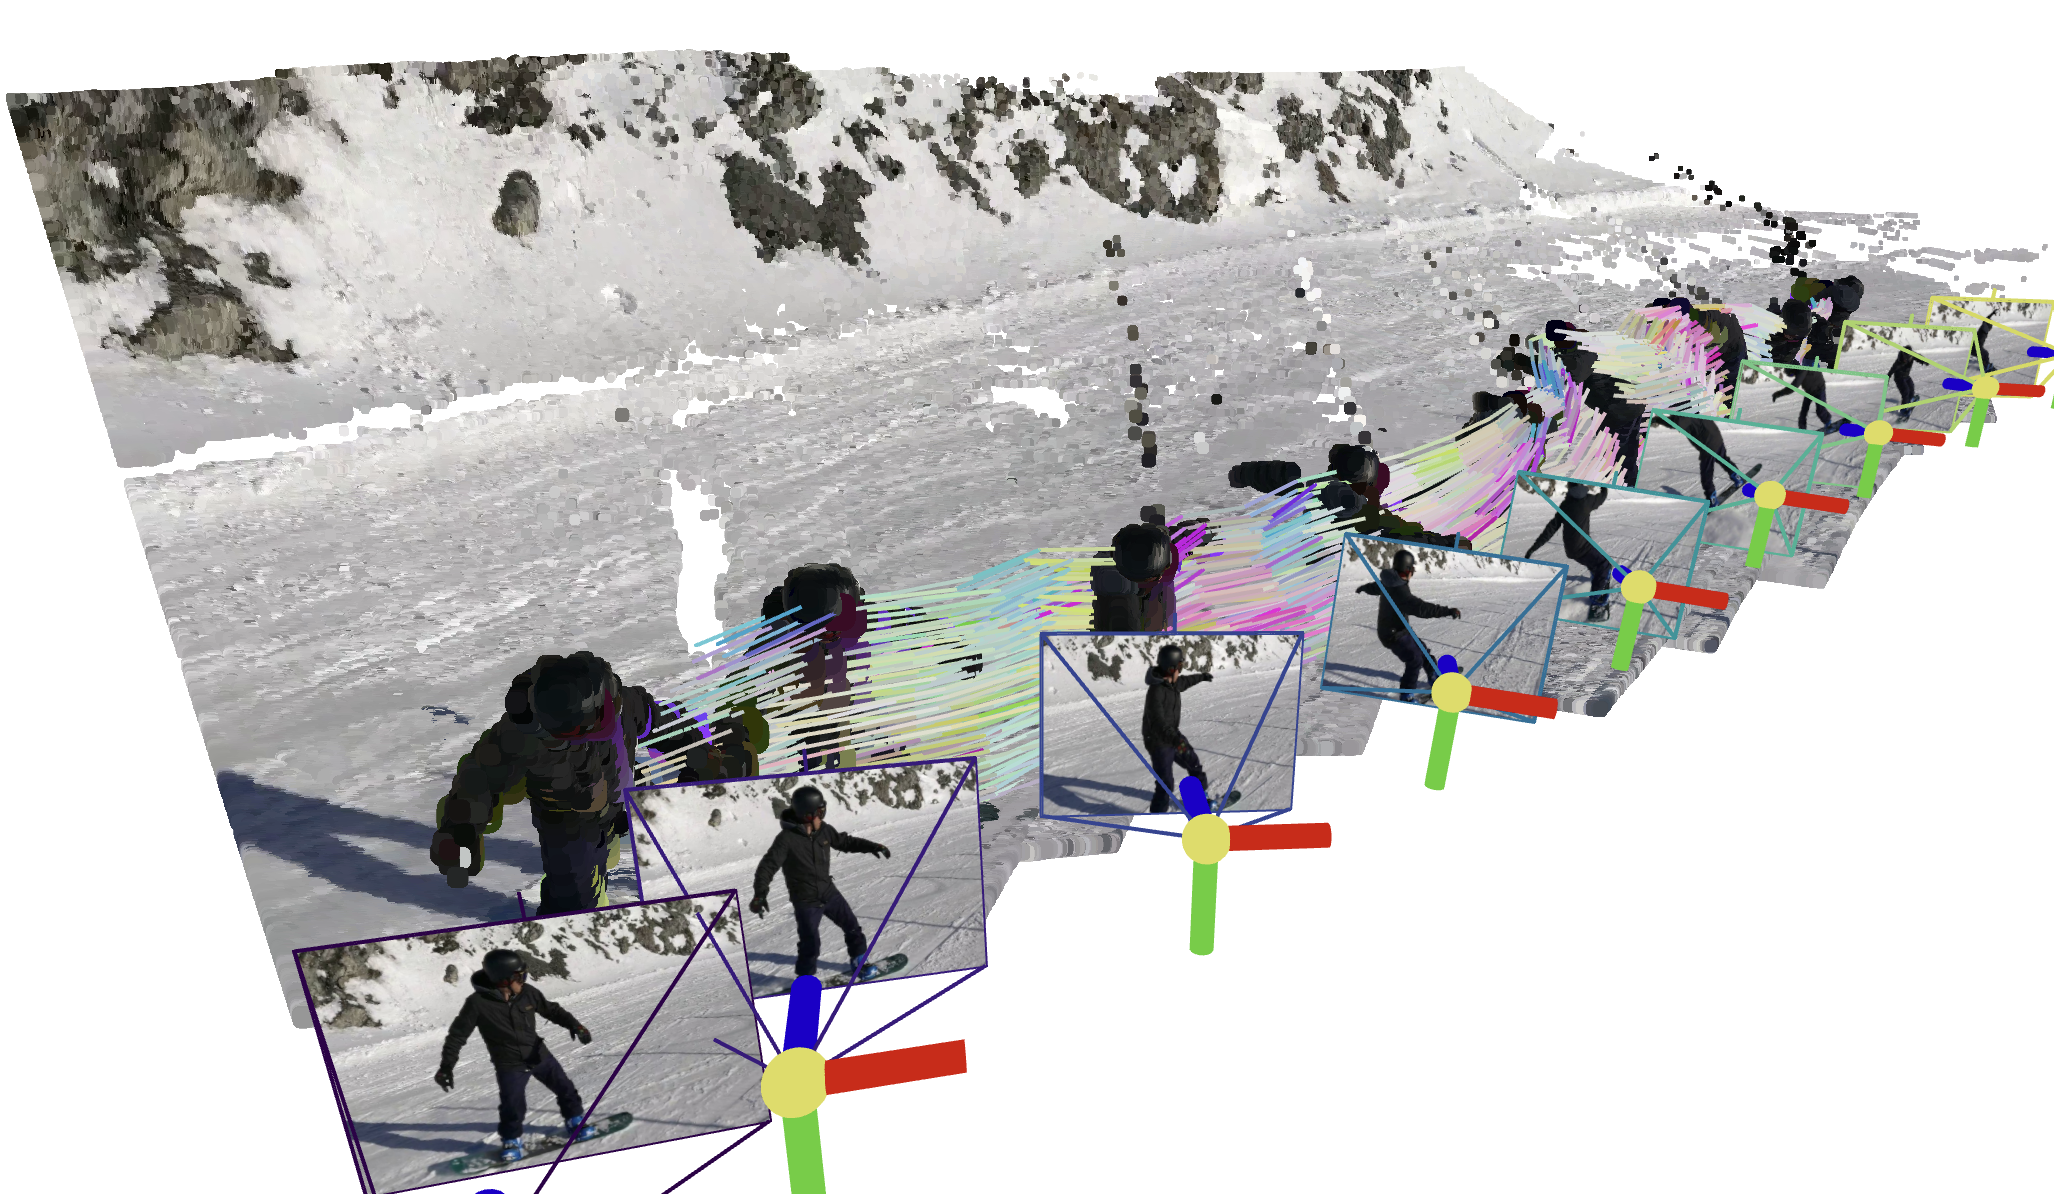
Type1: Posed RGBD video (Example0)
We provide an example who has Posed RGBD input with MegaSAM.
python inference.py --data_type="RGBD" --data_dir="assets/example0" --video_name="snowboard" --fps=1
Type2: unposed RGB video (Example1)
python inference.py --data_type="RGB" --data_dir="assets/example1" --video_name="xhs" --fps=6
Visualize your results
We provide two types of visualization. The guidance will be displayed in the terminal after running inference.py
🌟 Recommended: Gradio Demo with SAM 🌟
Please follow the instructions in the app_3rd README to configure the dependencies. Then,
python -m pip install gradio==5.31.0 pako
Our gradio demo enable the user to track the points on the target object easily, just try:
python app.py
Note❗
For users employing vscode as their IDE, the 3D trajectory visualization will automatically appear. Ensure that the port is accessible and consistent both locally and on the server. If not, you may need to manually forward the port using SSH -L.